The Kitchn Cure: Cure My Kitchen| Days 9 & 10

Meatballs in Tomato Sauce

The Kitchn Cure | Days Nine & Ten:

Cook yourself a meal/Plan a dinner party

Halle-flippin-luja!

This is my last post for The Kitchn Cure! Yup. It took me almost 3 months to finish a week-long project, but hey, hey — I did it! I’m actually not planning a party for the day 10 part, but I am throwing myself a little party for not bailing out after two months. Hehe.

The project itself really wasn’t hard, it’s just that it took me a long time to get things done because of the baby and a lack of motivation.

Anyway — On to day nine: cook yourself a meal!

I cook a lot in this here kitchen, but to wrap up this series of posts, I wanted to cook something extra special and share the recipe with you. This is one of my all time favorite recipes and a favorite in our home. Are you ready?

It’s meatballs!

Not just any old meatballs though, these are absolutely delicious! They are melt in your mouth-are there any more meatballs left, because I’ve been dreaming of them all night long-meatballs.

Meatballs in Tomato Sauce

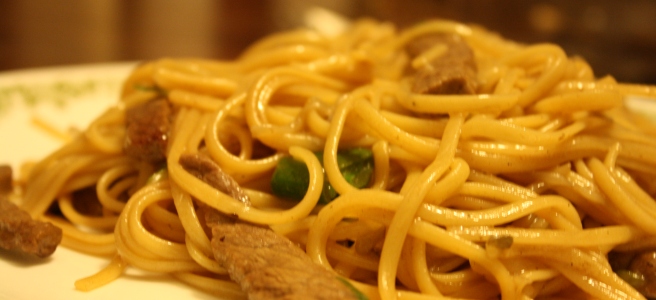
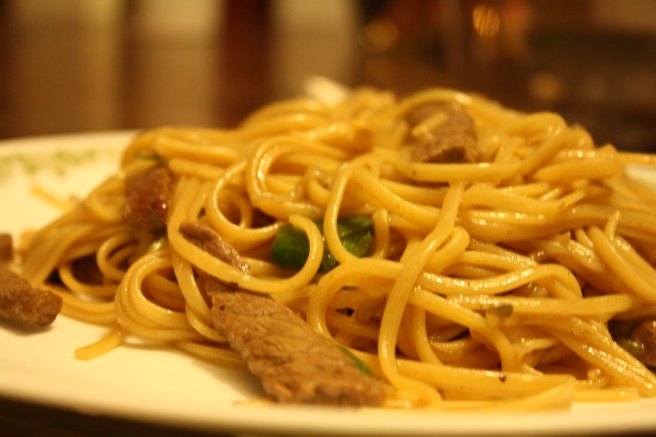
They are a bit pricy to shop for, so they are good for special occasions, but be warned — you’ll be making up special occasions just to have an excuse to make these tasty things. These meatballs don’t get served with pasta. There’s no law that says you couldn’t make pasta with them, but really it isn’t necessary, so why waste your time. Throw together a simple salad, buy a fresh baguette, or make some garlic bread, but really, the meatballs are the prize.

Meatballs in Tomato Sauce – Makes Four Servings (about 32 meatballs)
adapted from Williams-Sonoma Essentials of Slow Cooking

Ingredients

For the meatballs:
2 pounds mixed ground beef, pork and veal
1 egg
1 small yellow onion (finely chopped)
1/2 cup fresh bread crumbs or panko
1/4 cup pine nuts (toasted)
1/4 cup grated Parmesan (or Romano) cheese
2 tablespoons chopped fresh flat-leaf parsley
1 tablespoon chopped fresh oregano
1 tablespoon chopped fresh basil
3/4 teaspoon salt
1/2 teaspoon freshly ground pepper

For the sauce:
2 tablespoons olive oil
1 yellow onion (chopped)
3 cloves garlic (minced)
1 28 oz can diced tomatoes
1/2 cup dry white wine
2 tablespoons chopped fresh basil

Method

Meatballs — Add all ingredients to a large bowl and use your hands to gently, but thoroughly, blend together. Form the mixture into meatballs 2 inches in diameter and set aside.

Sauce — Add the oil to a Dutch oven set over medium heat. Add the onion and sauté until softened, 4-5 minutes. Add the garlic and sauté for 30 seconds longer. Stir in the diced tomatoes and wine then bring to a boil.

Marry them together — Carefully drop the meatballs into the sauce and gently spoon the sauce over them. Bring the sauce to a simmer, reduce the heat to medium low, cover, and cook until meatballs are firm and cooked through, 20-30 minutes. Remove the Dutch oven from the heat and let stand for 5 minutes before stirring in the basil. Transfer to a serving platter or divide meatballs among plates.

manga!

As for the party planning.. Tonight I will be having a glass of wine, admiring my now functioning kitchen, and wondering just how long it will actually take me to tackle the January Cure that Apartment Therapy announced today. That’s right folks, I’ll be attempting another cure to start the New Year 🙂

The Kitchn Cure: Cure My Kitchen| Day Eight

calla lillies

Hurray! The day is finally here. This is the day I’ve been waiting for folks, the day where the task was to buy flowers! I haven’t bought fresh flowers for my home in a ridiculously long time. Too long, but with the cure I HAD to do it. Oh darn.

The Kitchn Cure | Day Eight:

Bring fresh flowers or a plant into the kitchen

I decided on calla lillies because they were inexpensive and looked more exotic than the other choices at my local market. I would have liked to get a money tree at Ikea, but that will need to wait until I’m in the area. For now, I’m perfectly happy with these pretty flowers 🙂

Only two tasks left to go and I will be done with the cure. It’s seriously taken me just under two months. Sheesh, I’m glad that I’ve stuck with it though! I have a big dinner planned for tomorrow, hopefully it will finish up this project for good!

Do you buy fresh flowers for your home frequently? When you do, what kinds do you like to buy?

The Kitchn Cure: Cure My Kitchen| Day Seven

The Kitchn Cure | Day Seven:

Special Project

I really want to finish up the Kitchn Cure, so to speed things along, today’s post is a plan for the special project. We haven’t worked on it at all and don’t plan to for a few weeks. Or months. But, hammering down a plan is always a good start!

Click Image for Hardware Resource

We plan on lightning up the room by putting a beautiful light grey color on the walls and a medium grey color on the cabinets. Once they are done we will be updating the cabinet and drawer pulls, as well as getting new invisible hinges.

We still are debating on the table and chairs I posted in the last wish list post, because now we are considering an island and then converting the attached room into a dining room. Big ideas. We will see if we have the guts to do any of it.

We will paint though hopefully someday soon! I can’t wait to get this Cure behind me! I can finally see the finish line ahead. As always, if you are working on the cure, link up! And don’t forget to click over and check out NaughteeBits progress below!

Live Blogging From Our Kitchen: He Don’t Need No Stinkin Recipe!

Tonight I’ve decided to try something different.. Live blogging, from the kitchen, while BF makes a yummy dinner.

Yumy chef

He’s trying something new tonight and so far I’m loving the ingredients..

These are the babysitters while we work..

They won't change no stinkin diaper!
They won’t change no stinkin diaper!

So what BF has done so far was finely chop mint, thyme, and rosemary and added them to a small container of riccota and then stirred in a palm-full of each Romano and Asiago cheese.

And I’ve been summoned to change poop…

Be right back!

False alarm! He just wants to eat. How awkward.

Snapshot_20131119_184347

Now back to the food!!

Then he washed and rough cut carrots and snap peas — why, I don’t know yet..

While I was gone he :

  • pounded down some chicken breasts (with a rolling pin, need that meat tenderizer)
  • rolled some of the cheese mixture up into the breasts and tied with twine
  • poured some butter over each (need that pastry brush)
  • ground black pepper and fancy pink Himalayan salt (OOOh lala) over chicken

IMG_0902

And I took a few more pictures but the battery on my camera died.

So, we will just let that charge

while the chicken bakes
at 400 degrees
for about 25ish minutes.

 Okay! Camera is back! Here is the chicken before it went in the oven:

not cooked yet

And here are the mysterious snap peas and carrots:

IMG_0919

He just sauteed them with garlic, butter, salt and pepper.

Isaac is home in time to eat!

all i said was i love you that time!

It smells so good in here! Yay! Chicken is done!

Oh this smells and looks great!

This was such a great meal and a lot of fun to do!
So delicious!

Beef Lo Mein

beef lo mein

beef lo mein

Last year one of BF’s co-workers had made Beef Lo Mein for a company potluck party. He loved it so much that he asked her to share the recipe — and then he asked me to make it. Now, I’m always up for a cooking challenge, but with this one, I admit that I was a little intimidated. My intimidation wasn’t because the recipe looked complicated,  it was because I had never cooked Chinese food before.

After making this Lo Mein for the first time, I’ve made it on many more occasions. Not only is this recipe a family pleaser, it’s also super easy! So easy, in fact, that for those of you who aren’t all that confident in the kitchen, I am willing to bet that this recipe would build your confidence quickly. If you like Beef Lo Mein, I suggest you try this. It is delicious and like I’ve said — very simple.

Beef Lo Mein

Ingredients:
1 lb Fresh Chinese egg noodles – (medium width)*
1/2 lb Beef flank steak*
2 TBS Oyster sauce
2 TBS Dark soy sauce
1 TBS Light soy sauce
1/2 cup Chicken broth
2 tsp Sesame oil
2 tsp Sugar
1/2 tsp White pepper
4 TBS Peanut oil
2 slice Fresh peeled ginger — bruised
2 Garlic cloves — bruised
1 tsp Salt
1/2 lb Fresh bean sprouts – tails removed, patted dry*
1 cup Chinese garlic chives-Green onions-Cut into 2-in lengths

Beef Marinade:
1/2 TBS Soy sauce
2 TBS Rice wine or dry sherry
1/2 tsp Sugar
1/2 TBS Cornstarch
1 tsp Sesame oil

Method:
Cut meat against the grain in 1/4-inch thick slices. Mix beef marinade. Add beef strips and let stand for at least 15 minutes.

ADD NOODLES TO A LARGE POT of boiling salted water. Stir and when it reaches a second boil, reduce to a simmer and cook for 1 minute longer. Drain. Rinse with cold water. Drain thoroughly.

In a medium bowl, mix together oyster sauce, dark and light soy sauces, chicken broth, sesame oil, sugar, and white pepper.

Preheat a wok.*

Add 2 tablespoons of peanut oil, 1 slice of ginger and garlic, and half of the salt; sauté until fragrant. Increase to high heat, add beef; stir-fry until browned, about 2 minutes. Remove and set aside.

Heat remaining peanut oil in the wok over medium heat. Add the remaining ginger, garlic and salt. Pour in sauce mixture, stir and bring to a boil.

Add noodles and toss to coat with the sauce. Add the bean sprouts, chives and return the beef; stir-fry.

Pick out and discard ginger and garlic.

*Helpful Notes:

  • A large sautee’ pan can be used in place of a wok, just add half of the noodles and toss before adding the rest. Using tongs when using a sautee’ pan will make this very easy.
  • Bagged egg noodles work well if you can’t find fresh. Just be sure to cook them per package directions, then rinse with cool water and drain thoroughly.
  • Spaghetti or small linguine also work well in a pinch, but will not absorb as much of the sauce so your lo mein will be a little saucier. Follow package directions for cooking, rinse with cool water and drain thoroughly.
  • Canned bean sprouts may be used in place of fresh. The tails are already removed! Drain and pat dry with paper towels.
  • Sliced mushrooms and baby corn would make delightful additions. I haven’t tried this yet, but I will next time by adding 1 cup of each. Make sure they are dry before adding them to the pan.
  • Check your grocery store for pre-cut stir fry strips. Our market has these right in the fresh meat section and it makes life much easier! These packs usually come in higher weights than 1/2 pound but the rest can be freezed for another lo mein night, cooked up with eggs, or to make steak tacos/fajitas.

The Kitchn Cure: Cure My Kitchen| Day Six

The Kitchn Cure | Day Six:

Consider appliances, gadgets and tools Day Six of the kitchen cure has been a lot of fun to get together. It was the easiest task I’ve done so far and only took as long as putting this post together. This is the day where you can either choose to buy items that will help you out in the kitchen (spend option) or make a wish-list of items you’d eventually like to purchase (no spend option). I chose the “no-spend” option and created a wish-list. I had such a great time coming up with this list, I hope you’ll enjoy looking through it!

Food Canisters

Food Canisters
The Container Store – $99.99

When we realized we needed new containers for dry food storage we decided on these Good Grips POP canisters. I didn’t want a whole set because I didn’t know what the small ones would be used for. Instead, we bought some large ones for flour, sugar, and cereals. These containers are really nice! What I like the most about them is the way they feel — solid but not heavy. The lid is fun, easy to use, and simple to clean. They are nice to look at and hardly take up any space in the cabinet. Now that I’ve had some time to think about it, I’d like to get the set. The little ones will be great for baking goodies like chocolate chips and toffee pieces! The other ones will be used for pasta, rice, nuts, our other flours and sugars.

Butter Crock

Butter Crock
Williams Sonoma – $35.00

Not exactly sure of what a butter crock is? Well, I’ll tell you! A butter crock is a ceramic container that allows you to store butter outside of the fridge. The butter stays soft and spreadable for 30 days! All you have to do is add a little cold water to the bottom of the canister and then press a softened stick of butter into the top. Cool right? We’ve been looking for one for quite a while but they aren’t usually stocked in the stores. I really love the color of this Le Creuset crock. I normally don’t like the ombre effect they use on their products now, but I do like it on this. It’s so cheerful that I wouldn’t mind seeing it out on the counter.

Basting Brush

Basting Brush
Sur La Table – $11.00

This is one of those tools that I never remember I need.. Until I need it! A basting brush isn’t used all that often here but when a recipe requires one I sure do have a hard time coming up with an alternative! I usually resort to dipping a paper towel in my liquid and attempt it brush it on. Or, I’ll use a small measuring cup to drizzle the liquid on. Neither method works well so this is definitely a tool we could use! What I really like about this Le Creuset brush is the color! The basting tip also feels very nice and I know it will be easier and more effective to use than my makeshift techniques.

Meat Tenderizer

Meat Tenderizer
Crate and Barrel – $16.95

I like to flatten my chicken breasts before pan frying them; I really love thin and crispy chicken! Normally when I need to pound the chicken I use a small sauce pan because I don’t have a tenderizer. This method works out okay but it is a little awkward and can be tiring. I also always wonder if I am damaging the handle on on my pot. This OXO Meat Tenderizer has a nice weight to it and fits comfortably in my hands. It offers two non-stick sides – one for tenderizing and the other for flattening.

The Kitchn Cure: Cure My Kitchen| Day Five

kitchncure

Day five of the Kitchn Cure was easy breezy as I didn’t really have anything to do. I had taken so long to get days 1-4 done that I had no choice but to go to the market during those days so we would have food to eat!

The Kitchn Cure | Day Five:

Restock Ingredients

I ended up throwing away a ton of spices on day 2 of the cure. Unfortunately spices are effing expensive. I couldn’t justify blowing my food budget for the month so I’ll be buying what I need, as I need it. I’ve already picked a few up, but I still need plenty more.

No worries! Tossing my collection of expired spices wasn’t something to cry over.

There were plenty of foods left in my pantry that didn’t need restocking. Aside from the random spices I’ve needed, I ended up only having to buy flours, sugars, and some canned items. I also picked up things that I normally stock up on like meats, snacks and produce.

I didn’t take pictures of my groceries because I wasn’t thinking ahead to day 5. Instead here are some pictures I took while using the groceries I bought to make butternut squash soup and a Quiche.

Well, this wraps up day 5. I’m really looking forward to the next post. It will be highlighting some things that we’ve either already purchased or items I’ve added to my wish list. I’ve never done a post like that before so I’m excited!

If you decide to do the Kitchn Cure let me know; I will happily link up to your progress!

naughteebits.com is linked up! Check out B’s Kitchn Cure Day Four post here

Still a Skinny Minnie

Well, I realized a few days late that I met my goal of staying under 125 for a year. When I reached the goal last year, I can’t even begin to tell you how proud of myself I was. I had been working on losing weight for almost a year when I reached this weight. I had started on my own in November of 2009 but didn’t really start to melt away until I joined Weight Watchers in May of 2010.

I cannot tell you how easy and life changing their program is. I know a few of you lovies are in the program and are seeing the same results that I did. It really is wonderful and if you have ever considered joining I would strongly urge you to do so.

So this post is to mark a year of keeping my weight under 125. I have to say that losing the weight was the easy part for me at first. Once I lost every last pound I felt lost. With losing the weight there are rewards along the way, milestones and the feeling of pride and accomplishment. Maintaining the loss is a bit trickier though, you don’t feel a loss victory each week when you weigh in, instead you try to keep the balance. It’s easy to become frustrated and confused and hard to know when to stop with the losing weight mentality.

Looking back though, being able to say that after a full year, I still fit in my 13-year-old daughters clothes is the real reward.

I really kept it off and I am going to keep this as a revolving yearly goal. While I am really proud of myself, I owe it all to Weight Watchers as their program changed  my life tremendously.

Looking back, now that this year has passed, I realized that reaching 125 was the springboard for my confidence that I would need just before just about everything here fell apart. I didn’t realize how much getting through the process would change me as a person. It was surely an added bonus!

Now go eat some veggies and fruit 🙂

Cheers!

Fibro-Friendly Bacon and Asparagus Quiche – Great for Days When You’re Fatigued or Hurting Bad

Before I get started with a really yummy, super easy,  fatigue friendly and pain free recipe, I just want to say that I am offically crossing off the list “be kind to a stranger.”

I’ve been told by 3 three people now that I am worthy of crossing it off, so I figure it is about dang time!

Yay!

Thanks Toffee, Holly and Charlotte! You girls have all made me very happy 😀

Also on my list, I had written “make a pie from scratch.” I originally pictured myself making a banana cream pie and I would still like to but who knows if I will get around to it. I need to cross things off when I get the chance.  That being said, I made a quiche from scratch a few weeks ago and since it has a crust I concider it a pie.

Loophole!!

While the homemade crust was okay, it really hurt my arms to cut up the butter and flour to form the dough and it totally wasn’t worth the pain. Since I did like the recipe (in general) I’ve altered it quite a bit to fit my low calorie wants, my easiness desire and the need for a pain free dinner.

This recipe is great to make on days when you are too exhausted to stand in the kitchen for 30 minutes or if your in the midst of a train wrecked body day.

If you have energy and strength just remove all of the breaks I’ve added in.

To make this a complete meal throw a quick salad together (either from a bag or step by step taking breaks) and chill it in the fridge until the quiche is done baking. At the end of the day you will be left with a quick, easy  and balanced meal that everyone will be happy to eat. The best part is that if you are feeling terrible you will be proud of yourself for accomplishing at least something on one of your worst days!

Ingredients:

1 pound asparagus, trimed and cut into 1/2 inch pieces (check your grocers freezer – they might have it – no cutting!)

10 slices reduced sodium bacon or turkey bacon

1 (9 inch) ready made (refriderated unbaked) pie crust

3 egg whites, slightly beaten

1 egg

1 cup fat-free half & half

nutmeg, salt and pepper to taste

1 bag (about 1 & 1/4 cups) pre-shredded swiss cheese

Method:

Preheat oven 400° (or wait to do this when you are ready to assemble the pie)

Place asparagus in a double broiler and steam for about 2-6 minutes, it should be tender but still firm. Alternatly, follow directions on frozen veggie package.

Drain and set aside.

Take a break as long as you need (it could be hours, that’s fine, just cover it) OR continue to next step.

Cook bacon in a large skillet until evenly brown, drain on paper towels and set aside.

Take a break as long as you need (it could be hours, that’s fine, just cover it) OR continue to next step.

If you haven’t pre-heated oven yet, now it is time.

Place pie crust into 9 inch pie dish and if you have the energy try to make the edges look pretty, if you don’t just make sure its in the dish evenly and no crust is over hanging.

Crumble the bacon and spread it into the dish evenly, then layer on the asparagus, and cheese.

Brush the edges of the crust with some of the egg whites then add to the whites the remaining egg, half and half, nutmeg salt and pepper and mix.

Pour egg mixture on top of cheese.

Place foil just around the edges and bake for 25 minutes. Remove the foil (or ask someone to do it for you) and let it bake another 15 minutes.

Bring to room tempature and mangia!